Payments and Donations
Overview
Lead Liaison makes it easy to:
- Accept one-time payments and donations from over 30 payment gateways such as Stripe, PayPal, 2Checkout, Authorize.Net, WorldPay and many other leading providers.
- Accept recurring payments and donations using various payment gateways.
- Link payment plans from Stripe and initiate them via form submissions.
- Build and publish embeddable forms that securely process credit card information.
- Keep track of donors and donation amounts
- Use donation events and payment amounts as criteria to trigger workflow automation.
App Cloud
The Payment and Donation app is available in Lead Liaison's App Cloud. Make sure the app is installed before you connect a payment account and set up payment/donation forms.
Payments vs. Donations
Donations and Payments are used to accept one-time or recurring deposits. Donations differ from Payments because they can accept varying amounts whereas Payments only accept fixed amounts.
Adding a Payment Account (Gateway)
Create Your Payment Account First
Create your payment account first with the Payment Gateway provider. For example, go directly to www.stripe.com and create an account. The directions below will use information from your account to setup the Connector.
To add a Payment Account do the following:
- Go to Settings > Integrations > Connectors
- In the Payment Accounts section click the Connect more button

- Choose your Payment Account. In this example, we'll select Stripe
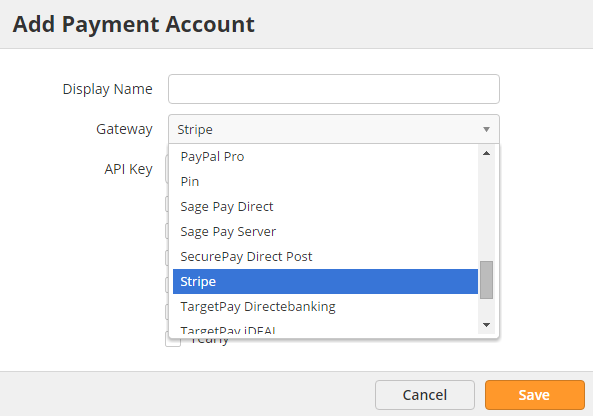
- Depending on the Payment Account selected, you'll see more options. In this case, Stripe asks for your Stripe API Key as well as a few additional options as shown below:
- Frequency = Predefined frequencies that can be used for recurring transactions.
- Plans = Stripe Payment Plans configured directly in your Stripe account and imported into Lead Liaison. Stripe Payment Plans can be initiated from form submissions. For example, you might configure a trial plan in Stripe, where billing occurs after a defined period of time while an evaluation/trial happens first, prior to payment.

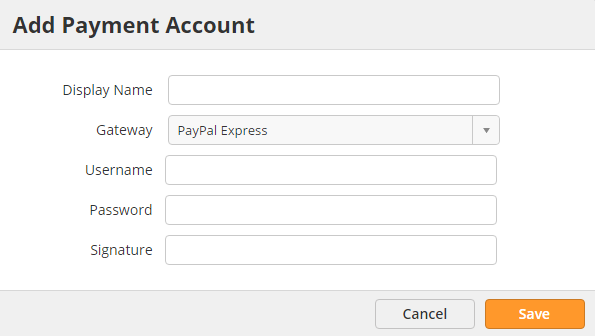
- In the example below, PayPal Express asks for Username, Password and Signature:
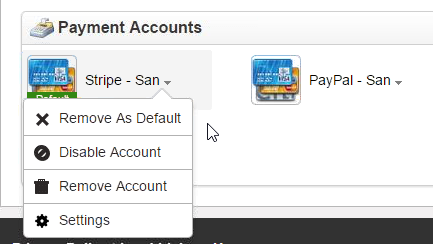
- Once the account is added it can be set as a default, disabled or removed:
Creating a Payment or Donation Web Form
To create a Payment or Donation Web Form, do the following:
- Click New > Web Form
- Select the appropriate folder, campaign, and vanity URL
- Choose "Donation form" if you're creating a web form to collect donations or "Payment form" if you're creating a web form to collect payments (products, services, etc.)
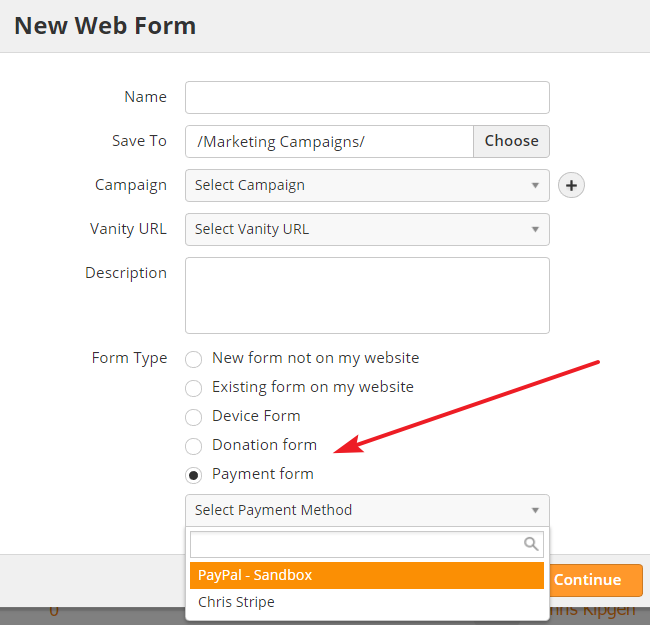
- Use the drop-down menu below to select the appropriate payment account.
- Click Continue
- Choose either a 1 column, 1:2 column, or 1:3 column layout.
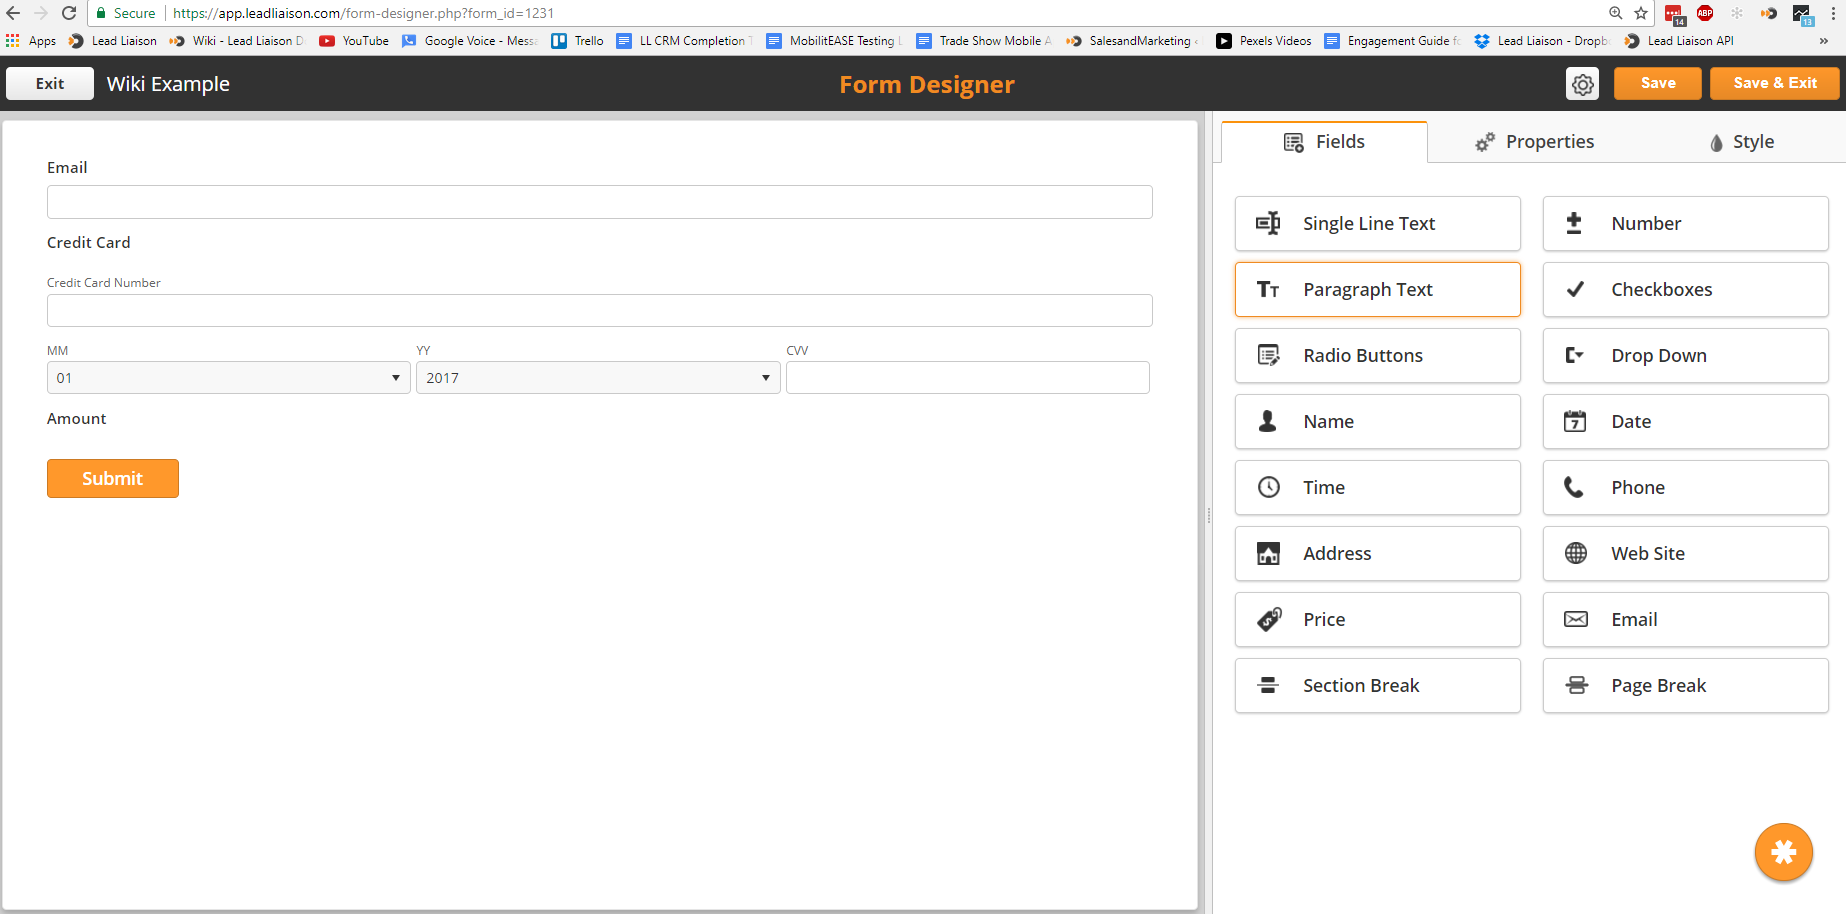
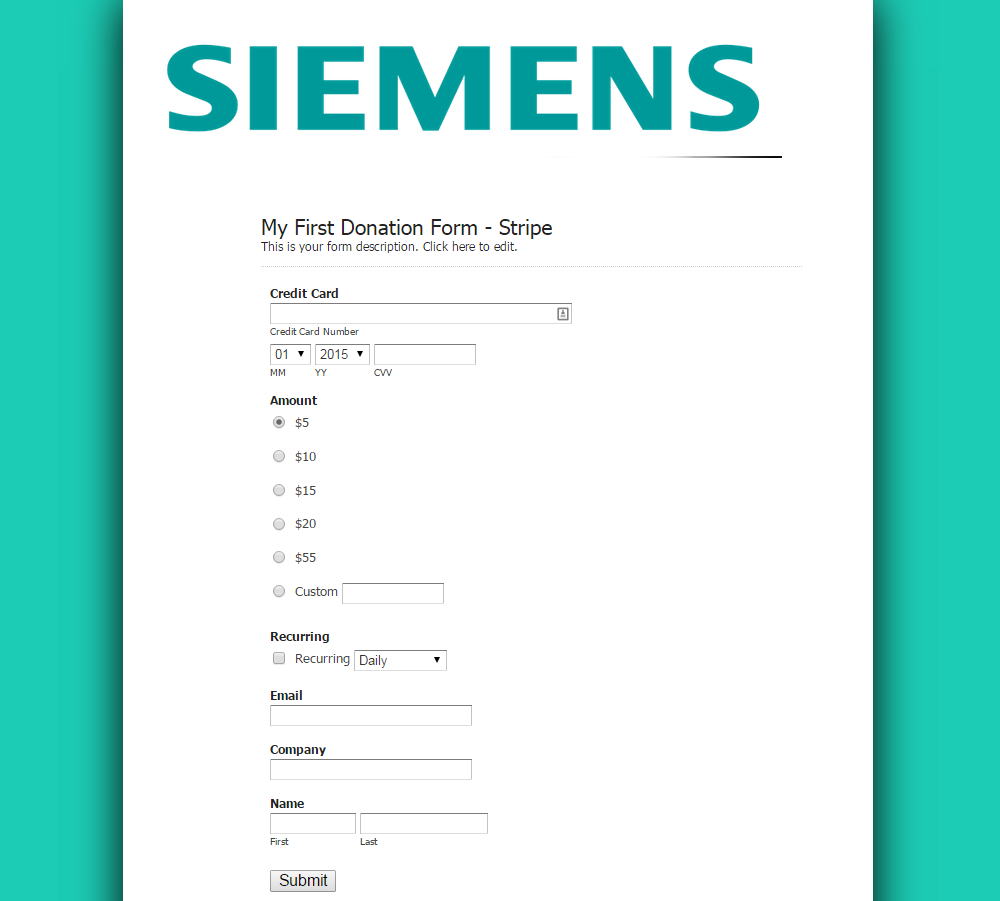
- The form builder will automatically insert Email, Credit Card, and Amount fields like in the screenshot below. Add new fields by dragging them from the right side, and edit existing fields by clicking on them.
Hiding the Amount Field
You can hide the Amount field if needed by clicking on the field on the left then selecting Hidden under the Rules section.
- Once you have finished adding fields, configure your payment options. To configure payment options click on the form Properties:

- Under the Plan Type section configure your options:
- None = Used for one-time charges at a fixed price.
- When selected enter a value in the Amount field. This value will be used to bill for one-time charges.
- Custom = Used for recurring charges.
- When selected enter a value in the Amount field.
- Select a Recurring Frequency to bill the specified amount at periodic intervals.
- Optionally enter a Frequency Title to add text to your form that describes the transaction.
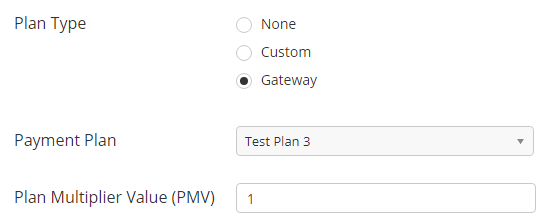
- Gateway = Used to link a Payment Plan from a payment gateway, such as Stripe, with a transaction. This option is currently only available for Stripe.
- Select a payment plan from your Strip account from the Payment Plan dropdown.
- Enter a Plan Multiplier Value (PMV). Your payment plan amount will be multiplied by the Plan Multiplier Value (PMV). For example, if your payment plan is $10, and your PMV is 2, then the amount charged will be $20.
- None = Used for one-time charges at a fixed price.
Embed the Form into a Page
There are several options to embed your payment/donation form into your website.
- Embed the form iframe code directly into your website
- Embed the form iframe code into a Lead Liaison landing page
- Embed the form iframe code into a Lead Liaison landing page that uses a Layout Template
In this example, we'll demonstrate scenario #2 above.
Step 1: Grab the form iframe
- Click Content > Web Forms
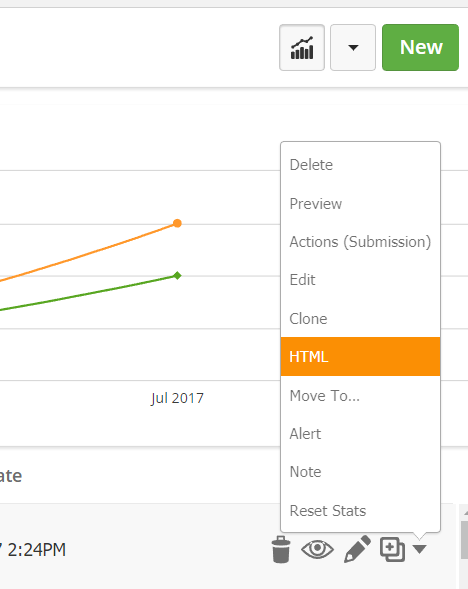
- Find your Payment/Donation form then click the drop-down menu under the Actions column
- Select HTML
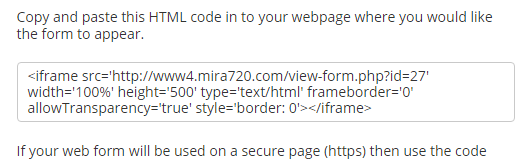
- Embed the code into the page you want the form to appear
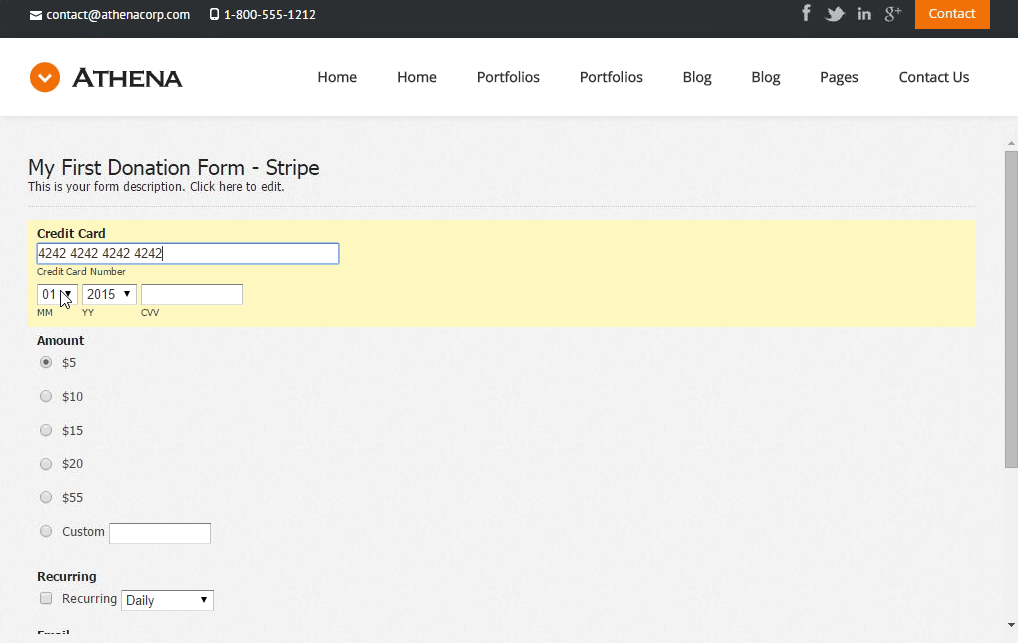
In the screenshot below, we embedded a Donation Form into a Lead Liaison landing page created with a layout template:
Step 2: Create your Visual Landing Page
- Go to New > Landing Page and choose the Visual Design Type
- Drag and drop the "Custom HTML" button to the canvas
- Copy/paste your iframe code into the box
- The end result will be a personalized page, that's been visually designed, with an intelligent payment/donation processing form
Important Notes When Embedding Donation/Payment Forms
- Due to the secure nature of the form it must run under HTTPS (SSL-secure). As a result, the only way to access the form is via the URL directly or by embedding the iframe code into any page, including a Lead Liaison landing page.
- Lets use an example. Here are the two ways you can make your form available for us:
Using the direct form URL in your marketing: https://t1.llanalytics.com/view-form.php?ll_custID=10268&id=2265
Embedding the iframe code below into any page under HTTP or HTTPS. The page could be
an external page on your website,
a Lead Liaison layout template,
or a Lead Liaison landing page.
<iframe src='https://t1.llanalytics.com/view-form.php?ll_custID=10268&id=2265' width='100%' height='500' type='text/html' frameborder='0' allowTransparency='true' style='border: 0'></iframe>
Payment/Donation Forms Not Visible on Landing Page Designer
It's not possible to insert a Payment/Donation Web Form using the "Web Form" button on the Visual Landing Page Designer or from the dropdown in the HTML Landing Page Designer. Instead, manually add the iframe code to the landing page.
Managing Donations/Payments
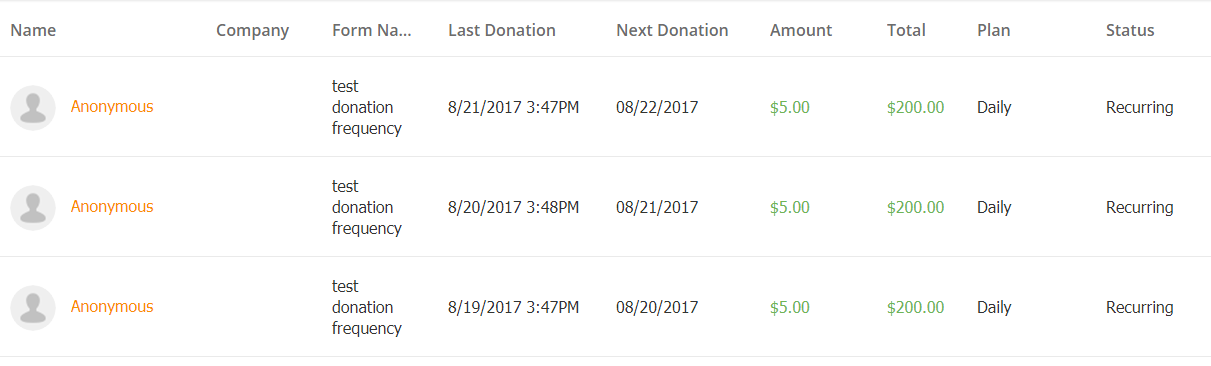
Donations and Payments have their own dedicated page where all donations/payments are listed in order of Last Donation. To access the management page, go to Settings > App Setup > Donations or Settings > App Setup > Payments. Each column is described in more detail below:
- Name = Name of the Prospect making the donation. The Prospect will be "Anonymous" if they are unidentified.
- Company = Name of the company the Prospect works for.
- Form Submitted = Name of the Donation or Payment Web Form.
- Last Payment/Donation = The last time a donation was collected.
- Next Donation = The next time a donation will be collected. Value will be empty for one-time payments/donations.
- Amount = Donation amount.
- Total = Total amount of donations received from the Prospect for the same donation plan.
- Plan = Frequency of recurring donation, one-time donation/payment, or name of Payment Plan.
- Status = Recurring or One time.
- Actions = Only visible for recurring donations. Allows the user to cancel the recurring billing plan.
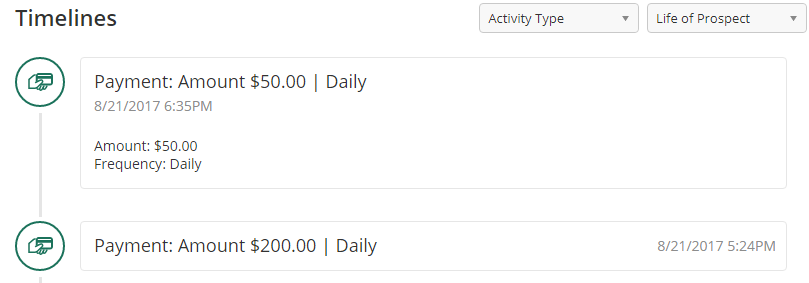
Prospect Activity
Each donation or payment is added to the Activity History for a Prospect in their Prospect Profile. The top screenshot represents the classic Lead Liaison Prospect Profile, as well as what would be seen in Salesforce.com. The bottom screenshot is the OneFocus™ CRM Prospect Profile Timeline.
Using Filters in Automation
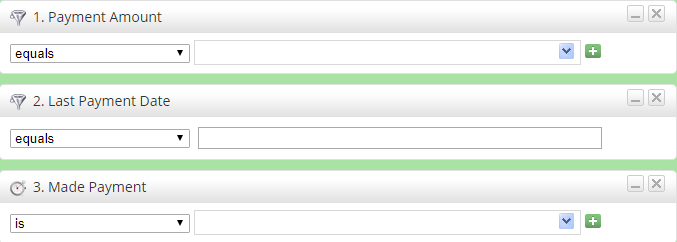
There are three filters and one trigger that can be used in a Workflow. The filters and trigger are described below:
- Payment/Donation Amount = The amount of the payment/donation.
Only Whole Amounts
Only whole dollar amounts may be used. For example, 60 (implying $60) should be used instead of $60 or 60.36 or $60.36
- Last Payment/Donation Date = If the date of the last payment/donation meets the criteria details. For example, find people that made a payment/donation within the past 30 days.
- Made Payment/Donation = If a payment/donation was made using the specified payment/donation form.
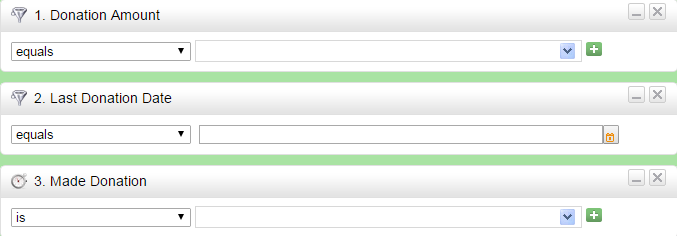
- Makes Payment/Donation = If a payment/donation is made using the specified payment/donation form. This is a future event wherein Lead Liaison looks for payments/donations and uses that to trigger something else (email response, alert, etc.).

Supported Payment Accounts
Lead Liaison supports the following Payment Accounts. If a Payment Account is not listed that requires support please contact your Lead Liaison representative.
| Gateway |
| 2Checkout |
| Agms |
| Alipay |
| Authorize.Net |
| Barclays ePDQ |
| Buckaroo |
| CardSave |
| Coinbase |
| Cybersource |
| Cybersource SOAP |
| DataCash |
| Dummy |
| ecoPayz |
| eWAY |
| First Data |
| Fasapay |
| GoCardless |
| Manual |
| Migs |
| Mollie |
| MultiSafepay |
| Netaxept (BBS) |
| Netbanx |
| Neteller |
| Network Merchants Inc. (NMI) |
| Pacnet |
| PayFast |
| Payflow |
| PaymentExpress (DPS) |
| PaymentSense |
| PayPal |
| PayU |
| Pin Payments |
| Realex |
| Sage Pay |
| SecurePay |
| SecPay |
| Sisow |
| Skrill |
| Stripe |
| TargetPay |
| WorldPay |
| WorldPay XML Direct |
| Veritrans |
| Yandex.Money |
Setting up your Stripe Account
- Sign up with Stripe, www.stripe.com, using your email address.
- Obtain your API key by going to Account Settings > API Keys > Live Secret Key
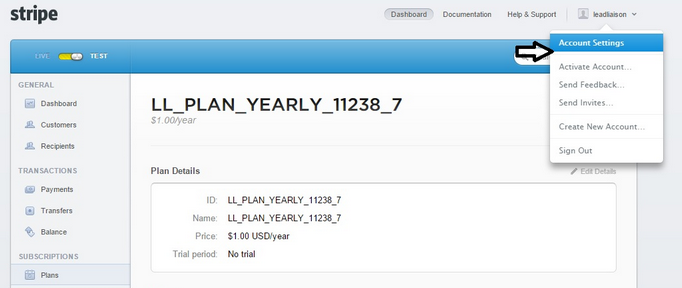

- When setting up your Lead Liaison Connector, you'll be able to select which recurring payment plans you want to support. The plan format will be added to Stripe as: LL_PLAN_INTERVAL_CustomerID_AccountID where the INTERVAL could be:
- DAILY
- MONTHLY
- WEEKLY
- EVERY 3 MONTHS
- EVERY 6 MONTHS
- For example: LL_PLAN_YEARLY_11238_7
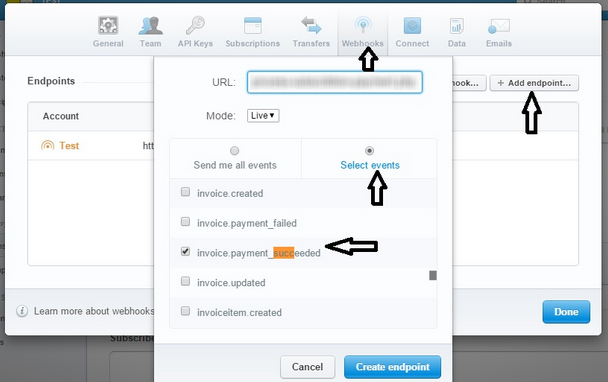
- Next, setup a webhook in Stripe that will send Lead Liaison a notification each time a billing occurs. To setup your webhook, do the following in your Stripe account:
- Go to Account Settings > Webhooks > Add endpoint...
- Enter the endpoint URL: https://process.leadliaison.com/services/process-subscription-payment.php
- Select the following events to let Stripe send a Webhook to Lead Liaison with the payment details: invoice.payment_succeeded
- Select Mode: Live
Viewing Payment Plan Transactions in Stripe
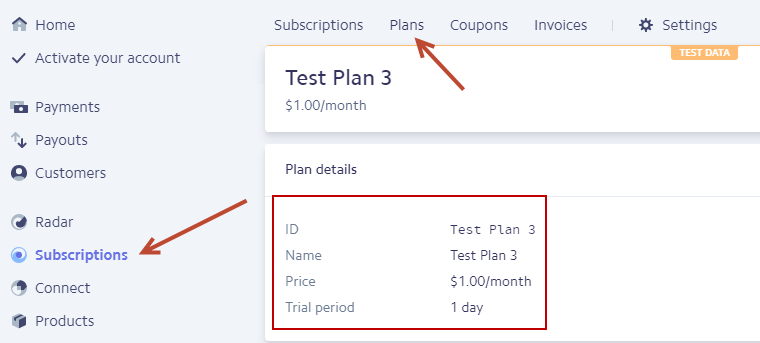
In the example below, we created a Lead Liaison form with a Plan Type of Gateway, and used the "Test Plan 3" plan, a preconfigured plan from Stripe.
Stripe Test Plan 3 summary inside Stripe:
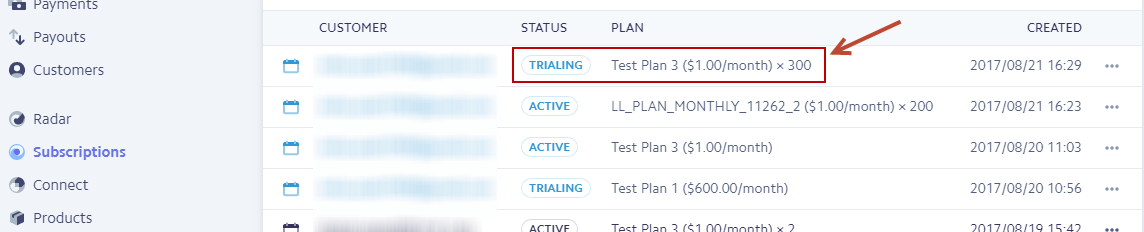
Once the form is submitted we can see all subscriptions, including trials and active payments, inside Stripe as shown below:
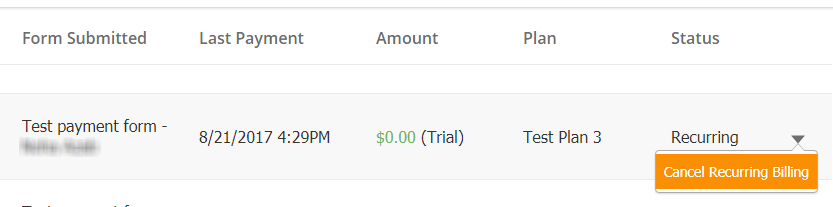
Cancelling Payment Plan Transactions in Lead Liaison
To cancel a Stripe Payment Plan from within Lead Liaison do the following:
- Navigate to Settings > App Setup > Payments
- Find your plan and click the down arrow to the right
- Select Cancel Recurring Billing
![]()
© 2021 Lead Liaison, LLC. All rights reserved.
13101 Preston Road Ste 110 – 159 Dallas, TX 75240 | T 888.895.3237 | F 630.566.8107 www.leadliaison.com | Privacy Policy